| Version 5 (modified by ab, 9 years ago) (diff) |
|---|
Setup Procedure
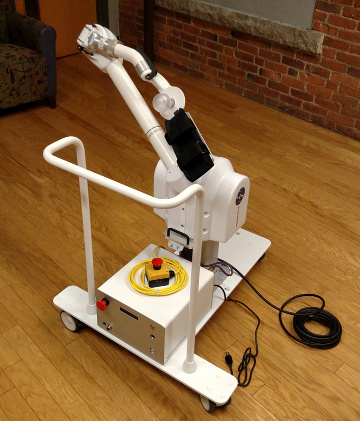
Before powering on your console, put the robot in the desired configuration and place it in the home position. The home position for a left-configured robot is shown below:
If you wish to change configurations (switch between left- and right-handed), power down the console before switching.
Teach & Play Demo - Single Arm
Overview
The Teach & Play program runs the following processes:
- client - connects to the robot
- position_controller - generates, records, plays, and pauses trajectories and runs a position control loop.
- rviz
- keyboard
Launching
To run teach and play, open a terminal and run the command the corresponds to the robot you're using. In this case, "left" and "right" refer to which robot you are using in a bimanual setup, not the configuration of the robot. If you only have one robot, it is always the "left" robot.
For the left robot
roslaunch proficio_client_ros teach_and_play_demo.launch side:=left
For the right robot
roslaunch proficio_client_ros teach_and_play_demo.launch side:=right
If you are not familiar with linux, see https://help.ubuntu.com/stable/ubuntu-help/. If you have not used ROS before, see http://wiki.ros.org/ for more information on how this works
When you run this command, you will see status messages scroll on the terminal, and then it will launch two additional windows -- a small black keypress window and an Rviz window. See http://wiki.ros.org/rviz for information on how to use Rviz.
Troubleshooting:
If you see Status [unset], the robot has not connected properly. Try using the other side.
Usage
In order to control the robot, put window focus on the keypress capture window by clicking on it. First, ensure that the robot is in home position, then press h to home the robot in software. when you are ready, press e to enable the robot. You will hear the motors turn on, and the robot will begin providing gravity assistance.
The following keys will control the robot:
Key Mapping
| Key | Description |
| h | Home the robot |
| e | Enable Torque |
| d | Disable Torque |
| r | Start recording trajectory |
| s | Stop recording trajectory |
| p | Play trajectory |
| o | Pause trajectory |
| q | Create Square Trajectory |
| CTRL+c | Close program |
Example
To run a teach and play, once the robot is enabled, you would:
- Press r to start recording
- Move the robot smoothly and slowly in the desired trajectory
- Press s to stop recording
- Press p to play the trajectory back. The trajectory will go forward and backward in the path you created. It will run until stopped
- Press o when you are done playing the trajectory.
- Press ctrl+c to close the program
Bimanual Demo
The bimanual demo is the same as the teach and play demo, but with two arms. Both arms should be in left configuration. Both robots will record at the same time, and each one needs to be moved separately.

